<script>
    var RatingCaptain_data_script = {
        /* REQUIRED | Email, on this address will be send message */
            "email": "{$order->email}",
        /* REQUIRED | Order in your system, this field should be unique */
            "external_id": "{$order->id}",
        /* Optional - Products in this order, each product must have id name and price. */
        "products": [
                    {
                        "id": "{$product->id}",
                        "name": "{$product->name}",
                        "price": "{$product->price}",
                        "imageUrl": "{$product->image}",
                    },
        ]
    }
</script>
<script src="https://api.ratingcaptain.com/js_v2/[Your website token]" async></script>

*Each item in bold must be properly configured depending on your system.
*Website token you can find here: Website page.


First steps
Second step - basic functions
Second step - basic functions
Welcome to Rating Captain! We have prepared for you special instructions how to configure the account.
<script>
    var rc_products = {/literal}[{foreach from=$items item=i name=list}
{
    'id': '{$i->product_id}',
    'name': '{$i->name}',
    'price': '{$i->price_gross|money_without_currency}',
    'imageUrl': '{$i->product->images[0]->url|product_img_url:th100}'
},
    {/foreach}]{literal};
        var RatingCaptain_data_script = {
            "email": '{client_email}',
            "external_id": '{order_id}',
            "products": rc_products
        }
</script>
<script src="https://ratingcaptain.com/api/js_v2/[Your website token]" async></script>

*Website token you can find here: Website page.
<script>
    var rc_products = [{products}
        {
        "id": "{products.product_id}",
        "price": "{products.float_price}",
        "imageUrl": "{products.img}",
        "name": "{products.name}"
        },
    {/products}];
    var RatingCaptain_data_script = {
        "email": '{email}',
        "external_id": '{order_id}',
        "products": rc_products
    }
</script>
<script src="https://ratingcaptain.com/api/js_v2/[Your website token]" async></script>

*Website token you can find here: Website page.
<script>
    var RatingCaptain_data_script = {
            "email": "[[email]]",
            "external_id": "[[orderid]]"
    }
</script>
<script src="https://ratingcaptain.com/api/js_v2/[Your website token]" async></script>

*Website token you can find here: Website page.
{% block page_checkout_finish_rating_captain %}
    {% set ratingProducts = [] %}
    {% for lineItem in page.order.lineItems.elements %}
        {% if lineItem.type is same as 'product' %}
            {% if lineItem.cover.url %}
                {% set ratingProduct = {
                    id: lineItem.payload.productNumber,
                    name: lineItem.label,
                    price: lineItem.price.totalPrice,
                    imageUrl: lineItem.cover.url,
                } %}
            {% else %}
                {% set ratingProduct = {
                    id: lineItem.payload.productNumber,
                    name: lineItem.label,
                    price: lineItem.price.totalPrice,
                } %}
            {% endif %}
            {% set ratingProducts = ratingProducts|merge([ratingProduct]) %}
        {% endif %}
    {% endfor %}
    {% set ratingCaptainData = {
        email: page.order.orderCustomer.email,
        external_id: page.order.orderNumber,
        products: ratingProducts
    } %}
    <script>
        var RatingCaptain_data_script = [{{ ratingCaptainData | json_encode | raw }}];
    </script>
    <script src="https://ratingcaptain.com/api/js_v2/[Your website token]" async></script>
{% endblock %}

*Website token you can find here: Website page.
How to add the logo?
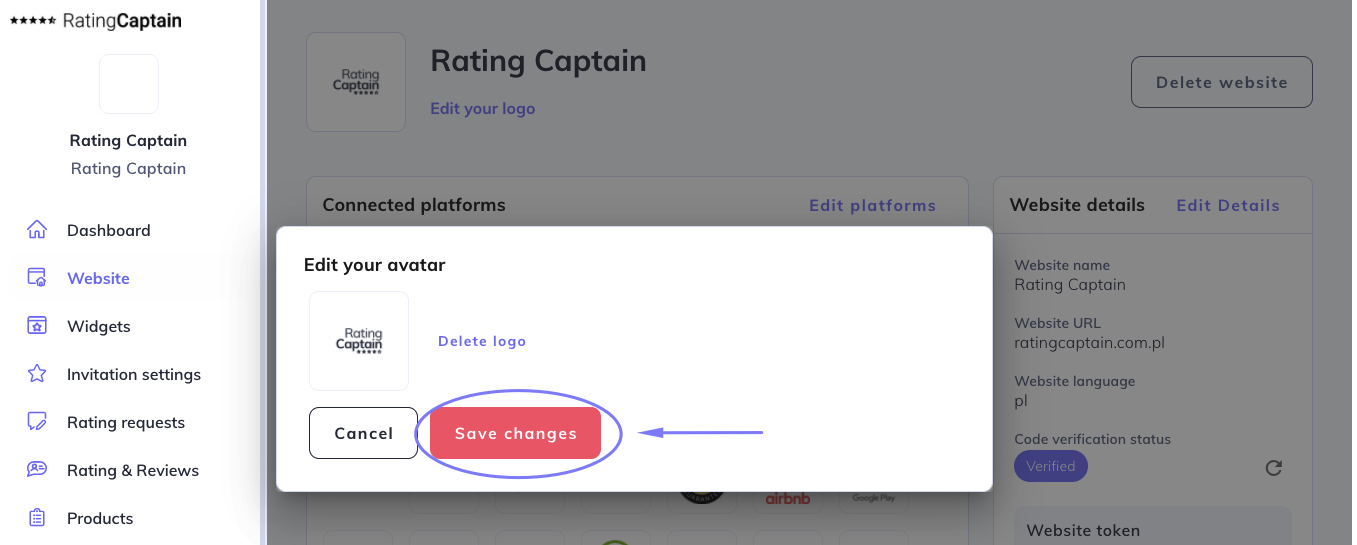
Go to the Website section.
At the top a white square will appear with the label Edit your logo.
After clicking on the inscription you will see the file adding window. The file should have a .png or .jpg extension, and weigh less than 2MB. After importing the file, click Save changes.

How to add a review site?
Go to the Website tab and then Profiles.
In the Find your profile field enter the company name and the city in which it is located and click Search. Next, the application will show you the found profiles of your company on various portals.
Select the profiles to which you want to collect reviews by clicking the Add this profile button. On the right side you will find a section Added profiles. Confirm their selection by clicking Add selected profiles. We recommend that you start by choosing your profile in Google My Business.
How to setup a feedback invitation?
Go to the Invitation settings --> Email settings.
You will find there an editable invitation template. Below the template, enter the e-mail address to which notifications about your feedback will be sent.
On the right side you will see the Emails settings option, where you can add information how many days after placing the order the customer will receive an invitation. If you don’t change anything there, your customers will be receiving an invitation after 7 days. You can also decide how often and how frequently the application will send the invitations. We recommend choosing 2 repeats every 5 days. If the client has already given the review, he won’t get another invitation.
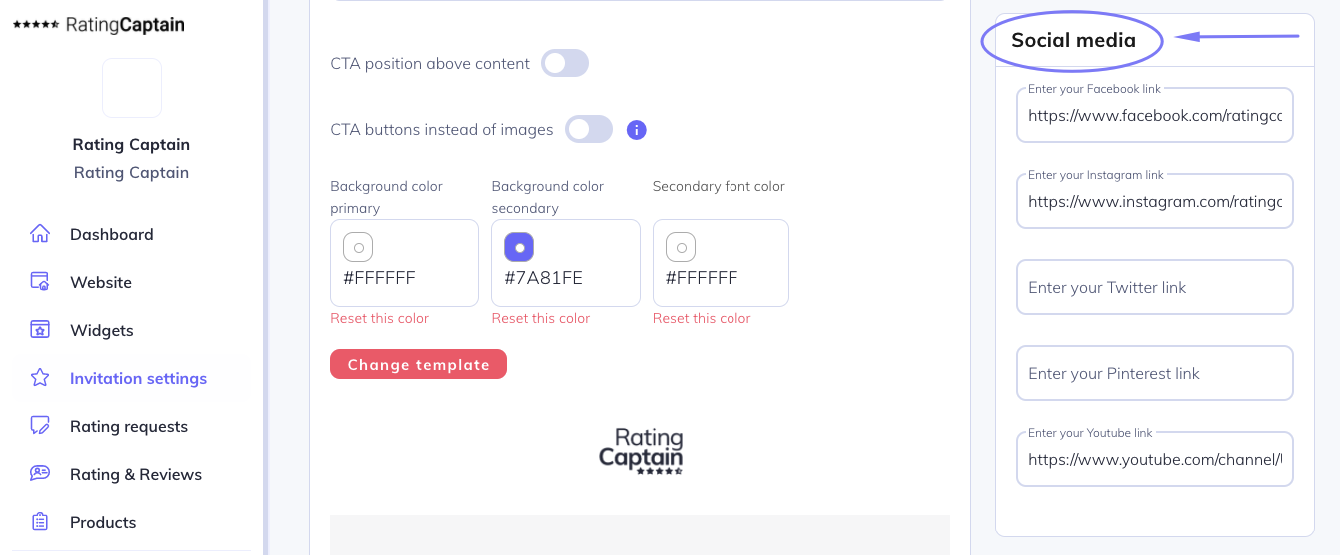
It is really worth sending a test invitation. In the tab Invitation settings you are able to add your social media, that will show up on invitations.

Don’t forget to save the changes.
Content of the form after receiving a negative reaction
It is a good idea to set up the content of the message, which will be sent to customers who want to share a negative review. Go to the Invitation settings section.
Below you will see an editable message template. Remember to save the changes.
Correct account configuration - Invitation queue
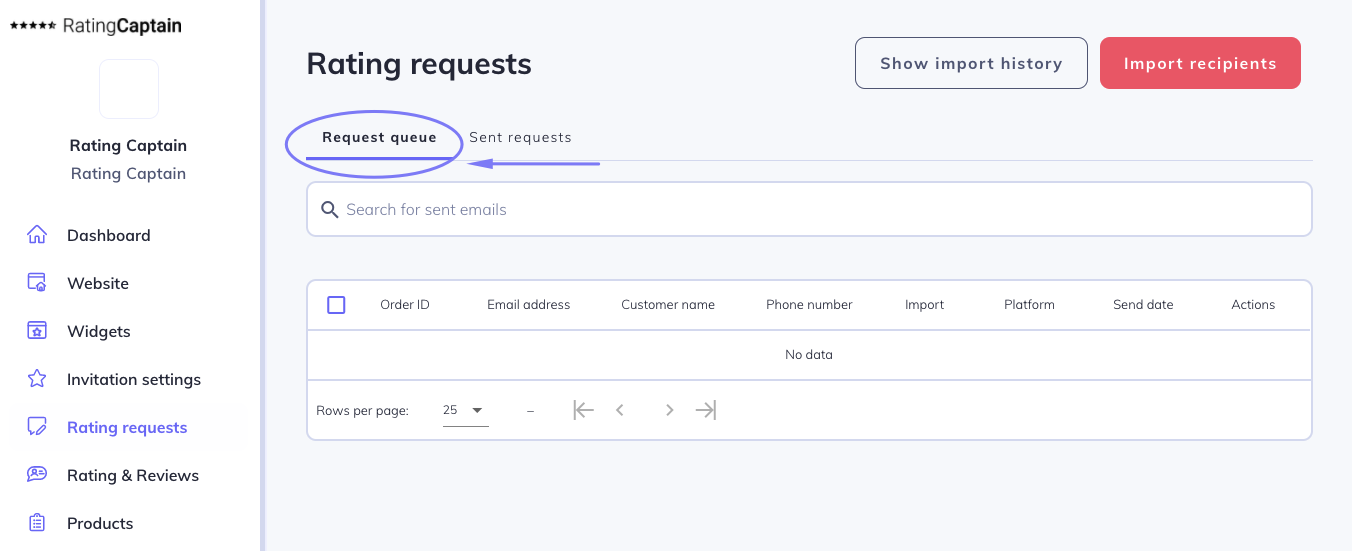
The tool is properly configured if in 24 hours after integration, orders and customer e-mails start to appear in the tab Invitations → Invitation queue.
There you will also see the date the request for feedback was sent to the customer.

Personalize your invitations
Personalize your feedback invitations by adding name, e-mail address, phone number, order or a list of products the customer has purchased. Of course, you can include several options in the body of message.
With a personalized invitation, you can increase the chances that the customer will respond to the invitation.
Wie kann man die Effektivität von E-Mails verbessern?
Um die Effektivität von E-Mails zur Einholung von Meinungen zu verbessern, können Sie folgende Elemente in sie einbeziehen:
- Ihr Firmenlogo - Menschen sind größtenteils visuell orientiert, daher können sie sich durch das Logo daran erinnern, wer ihnen schreibt. Darüber hinaus haben Sie Einfluss auf die Steigerung der Bekanntheit Ihrer Marke;
- ein kurzer Betreff der E-Mail, der über ihren Zweck informiert;
- es ist auch ratsam, über dem eigentlichen Inhalt der E-Mail einen CTA (Call-to-Action) zu platzieren, also eine Aufforderung zu einer bestimmten Handlung in Form von Schaltflächen;
- fügen Sie Variablen wie Vorname, E-Mail-Adresse, Bestellnummer oder Produktliste hinzu;
- passen Sie die Farbgebung der Einladung an die Farben Ihrer Marke an;
- Sie können auch einen anderen E-Mail-Vorlage testen.
Wie lade ich eine Datei mit Kunden-E-Mails hoch?
Um die Kundenliste zu importieren, befolgen Sie die folgenden Schritte.
- Wechseln Sie zum Tab Einladungen.
- Klicken Sie auf die Schaltfläche Kunden importieren in der oberen rechten Ecke.
- Stellen Sie das Datum für den Versand der Einladungen zur Bewertung ein.
- Klicken Sie dann auf Datei hinzufügen und importieren Sie die vorbereitete Kontaktliste.
- Klicken Sie abschließend auf Änderungen speichern.
- In der Einladungswarteschlange werden die importierten Daten angezeigt.
In der Anwendung können Sie eine Beispieldatei .csv oder .xlsx herunterladen, die Sie dann entsprechend Ihren Bedürfnissen bearbeiten können.
Achtung! Ihre Datei sollte eine Spalte mit dem Namen 'email' (erforderlich) enthalten.
In der Datei können Sie mehrere Spalten hinzufügen. Unten finden Sie ihre Überschriften mit Beschreibungen.
- email - E-Mail-Adresse des Kunden z.B. '[email protected]' - erforderliche Spalte.
- name - Vorname oder Vor- und Nachname des Kunden z.B. 'Jan Kowalski'.
- phone - Telefonnummer des Benutzers z.B. '111222333'.
- website - Durch Angabe dieses Feldes können wir E-Mails gleichzeitig zu mehreren Seiten in Rating Captain importieren. Dieses Feld sollte mit dem genauen Namen der Seite in Rating Captain ausgefüllt sein. Wenn Sie dieses Feld nicht angeben, wird der Import standardmäßig auf der aktiven Seite gespeichert.
- place_name - Durch Angabe dieses Feldes geben Sie an, welcher Bewertungsportal in Rating Captain dem Kunden zugeordnet werden soll. Dieses Feld sollte mit dem genauen Namen des Bewertungsportals in Rating Captain ausgefüllt sein. Alle Ihre verbundenen Bewertungsportale finden Sie im Tab Seite => Profile. Wenn Sie dieses Feld nicht angeben, weist Rating Captain automatisch eine Plattform für Bewertungen zu.
- products - Liste der Produkte in der Bestellung. Dies ist eine fortgeschrittene Option und erfordert die Hilfe eines Entwicklers. Dieses Feld sollte ein gültiges JSON-Feld sein. Jedes Objekt im Array sollte Felder wie id - Produkt-ID, name - Produktname, price - Produktpreis, optional image_url - URL des Produktbildes, product_url - Produkt-URL enthalten.
Die generierte Datei mit den angegebenen Überschriften sollte im Microsoft Excel-Format (.xlsx) oder .csv (Werte durch Semikolon oder Komma getrennt) gespeichert werden.
Wie analysiert man Kundenbewertungen?
Jetzt, da Sie bereits Feedback sammeln, ist es Zeit für die Analyse. Um Bewertungen und Kundenmeinungen zu überprüfen, befolgen Sie die folgenden Schritte.
- Wechseln Sie zum Tab Bewertungen und Meinungen.
- Oben finden Sie Filter, mit denen Sie einzelne Arten von Meinungen analysieren können.
- In der Kategorie-Sektion können Sie sehen, mit welchen Hindernissen Kunden bei der Nutzung Ihres Angebots konfrontiert sind.
- In der Tabelle sehen Sie Bewertungen und Kommentare entsprechend den von Ihnen ausgewählten Filtern.
- Achten Sie auch auf die Stimmung der Meinungen (roter oder grüner Balken).
Sehr wichtig! Vergessen Sie nicht, auf jede erscheinende Meinung zu antworten.
Wenn Sie die Schwachstellen Ihrer Kunden bereits kennen, versuchen Sie, Änderungen in Ihrem Unternehmen vorzunehmen, die die Zufriedenheit der Verbraucher erhöhen. Vielleicht müssen Sie sich den Kundenservice genauer ansehen? Oder ist es Zeit, Ihren Produktlieferanten zu wechseln?