<script>
    var RatingCaptain_data_script = {
        /* REQUIRED | Email, on this address will be send message */
            "email": "{$order->email}",
        /* REQUIRED | Order in your system, this field should be unique */
            "external_id": "{$order->id}",
        /* Optional - Products in this order, each product must have id name and price. */
        "products": [
                    {
                        "id": "{$product->id}",
                        "name": "{$product->name}",
                        "price": "{$product->price}",
                        "imageUrl": "{$product->image}",
                    },
        ]
    }
</script>
<script src="https://api.ratingcaptain.com/js_v2/[Your website token]" async></script>

*Each item in bold must be properly configured depending on your system.
*Website token you can find here: Website page.


First steps
Second step - basic functions
Second step - basic functions
Welcome to Rating Captain! We have prepared for you special instructions how to configure the account.
<script>
    var rc_products = {/literal}[{foreach from=$items item=i name=list}
{
    'id': '{$i->product_id}',
    'name': '{$i->name}',
    'price': '{$i->price_gross|money_without_currency}',
    'imageUrl': '{$i->product->images[0]->url|product_img_url:th100}'
},
    {/foreach}]{literal};
        var RatingCaptain_data_script = {
            "email": '{client_email}',
            "external_id": '{order_id}',
            "products": rc_products
        }
</script>
<script src="https://ratingcaptain.com/api/js_v2/[Your website token]" async></script>

*Website token you can find here: Website page.
<script>
    var rc_products = [{products}
        {
        "id": "{products.product_id}",
        "price": "{products.float_price}",
        "imageUrl": "{products.img}",
        "name": "{products.name}"
        },
    {/products}];
    var RatingCaptain_data_script = {
        "email": '{email}',
        "external_id": '{order_id}',
        "products": rc_products
    }
</script>
<script src="https://ratingcaptain.com/api/js_v2/[Your website token]" async></script>

*Website token you can find here: Website page.
<script>
    var RatingCaptain_data_script = {
            "email": "[[email]]",
            "external_id": "[[orderid]]"
    }
</script>
<script src="https://ratingcaptain.com/api/js_v2/[Your website token]" async></script>

*Website token you can find here: Website page.
{% block page_checkout_finish_rating_captain %}
    {% set ratingProducts = [] %}
    {% for lineItem in page.order.lineItems.elements %}
        {% if lineItem.type is same as 'product' %}
            {% if lineItem.cover.url %}
                {% set ratingProduct = {
                    id: lineItem.payload.productNumber,
                    name: lineItem.label,
                    price: lineItem.price.totalPrice,
                    imageUrl: lineItem.cover.url,
                } %}
            {% else %}
                {% set ratingProduct = {
                    id: lineItem.payload.productNumber,
                    name: lineItem.label,
                    price: lineItem.price.totalPrice,
                } %}
            {% endif %}
            {% set ratingProducts = ratingProducts|merge([ratingProduct]) %}
        {% endif %}
    {% endfor %}
    {% set ratingCaptainData = {
        email: page.order.orderCustomer.email,
        external_id: page.order.orderNumber,
        products: ratingProducts
    } %}
    <script>
        var RatingCaptain_data_script = [{{ ratingCaptainData | json_encode | raw }}];
    </script>
    <script src="https://ratingcaptain.com/api/js_v2/[Your website token]" async></script>
{% endblock %}

*Website token you can find here: Website page.
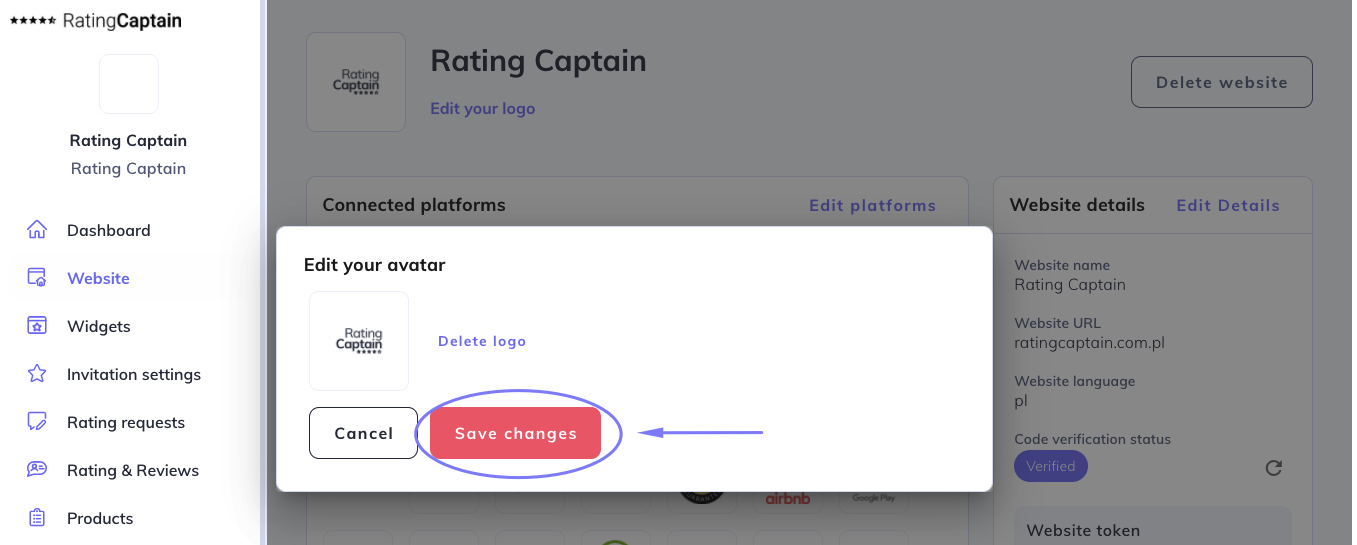
How to add the logo?
Go to the Website section.
At the top a white square will appear with the label Edit your logo.
After clicking on the inscription you will see the file adding window. The file should have a .png or .jpg extension, and weigh less than 2MB. After importing the file, click Save changes.

How to add a review site?
Go to the Website tab and then Profiles.
In the Find your profile field enter the company name and the city in which it is located and click Search. Next, the application will show you the found profiles of your company on various portals.
Select the profiles to which you want to collect reviews by clicking the Add this profile button. On the right side you will find a section Added profiles. Confirm their selection by clicking Add selected profiles. We recommend that you start by choosing your profile in Google My Business.
How to setup a feedback invitation?
Go to the Invitation settings --> Email settings.
You will find there an editable invitation template. Below the template, enter the e-mail address to which notifications about your feedback will be sent.
On the right side you will see the Emails settings option, where you can add information how many days after placing the order the customer will receive an invitation. If you don’t change anything there, your customers will be receiving an invitation after 7 days. You can also decide how often and how frequently the application will send the invitations. We recommend choosing 2 repeats every 5 days. If the client has already given the review, he won’t get another invitation.
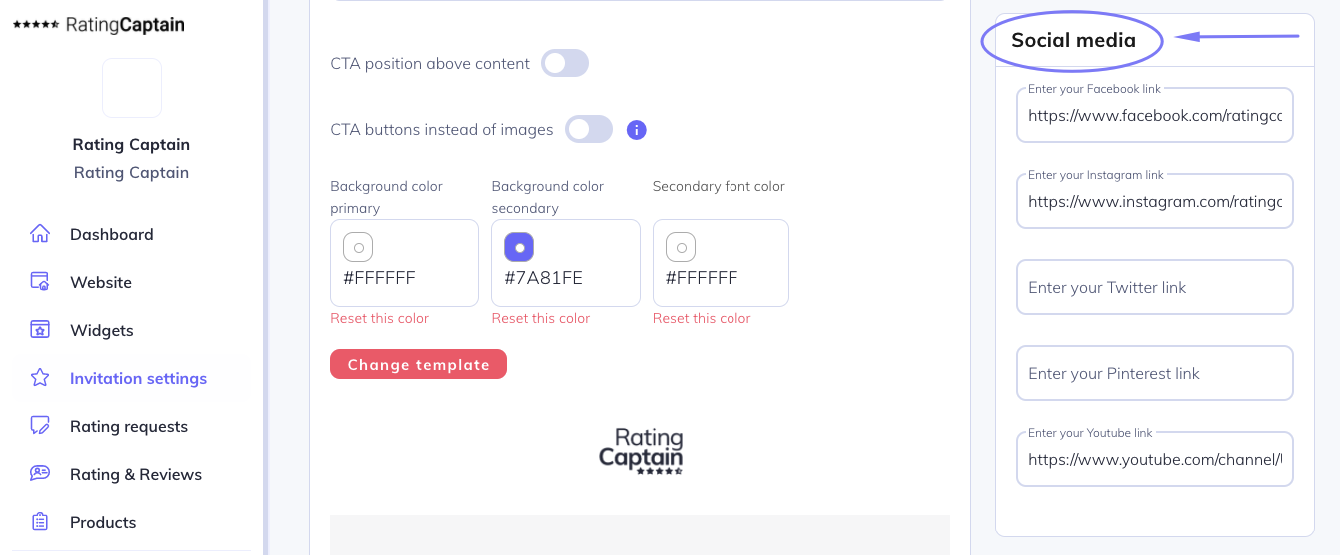
It is really worth sending a test invitation. In the tab Invitation settings you are able to add your social media, that will show up on invitations.

Don’t forget to save the changes.
Content of the form after receiving a negative reaction
It is a good idea to set up the content of the message, which will be sent to customers who want to share a negative review. Go to the Invitation settings section.
Below you will see an editable message template. Remember to save the changes.
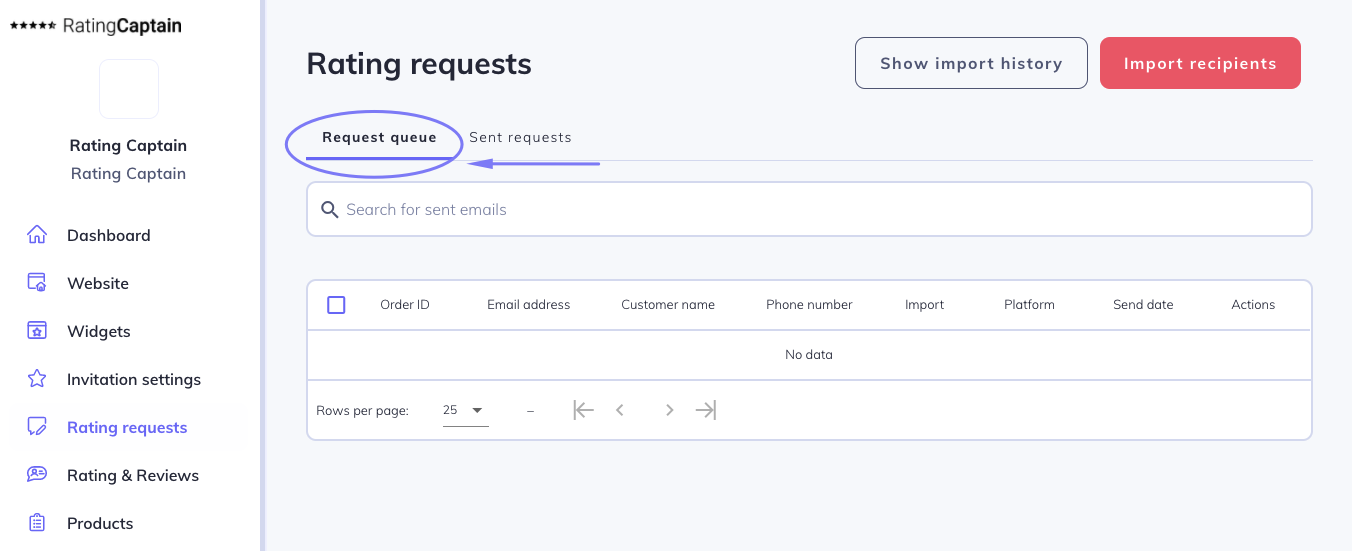
Correct account configuration - Invitation queue
The tool is properly configured if in 24 hours after integration, orders and customer e-mails start to appear in the tab Invitations → Invitation queue.
There you will also see the date the request for feedback was sent to the customer.

Personalize your invitations
Personalize your feedback invitations by adding name, e-mail address, phone number, order or a list of products the customer has purchased. Of course, you can include several options in the body of message.
With a personalized invitation, you can increase the chances that the customer will respond to the invitation.
¿Cómo mejorar la eficacia de los correos electrónicos?
Para mejorar la efectividad de los correos electrónicos de invitación a dejar una opinión, puedes incluir los siguientes elementos:
- logo de tu empresa: la mayoría de las personas son visuales, por lo que gracias al logo pueden recordar quién les está escribiendo, además, tienes influencia en el aumento del reconocimiento de tu marca;
- un asunto del correo breve que informe sobre su propósito;
- también es recomendable probar la inclusión de un CTA (llamado a la acción) antes del contenido del correo, en forma de botones;
- agrega variables como el nombre, la dirección de correo electrónico, el número de pedido o la lista de productos;
- elige una paleta de colores para la invitación que se ajuste a los colores de tu marca;
- también puedes probar con otra plantilla de correo.
¿Cómo cargar un archivo con correos electrónicos de clientes?
Para importar la lista de clientes, sigue los siguientes pasos.
- Ve a la pestaña Invitaciones.
- Haz clic en el botón Importar clientes en la esquina superior derecha.
- Establece la fecha de envío de las invitaciones para solicitar opiniones.
- Luego haz clic en Agregar archivo e importa la lista de contactos preparada.
- Finalmente, haz clic en Guardar cambios.
- En la Cola de invitaciones aparecerán los datos importados.
En la aplicación puedes descargar un archivo de ejemplo .csv o .xlsx, que luego puedes editar según tus necesidades.
¡Atención! Tu archivo debe contener una columna llamada 'email' (obligatorio).
En el archivo puedes agregar varias columnas. A continuación se muestran sus encabezados junto con una descripción.
- email - dirección de correo electrónico del cliente, por ejemplo, '[email protected]' - columna obligatoria.
- name - nombre o nombre completo del cliente, por ejemplo, 'Jan Kowalski'.
- phone - número de teléfono del usuario, por ejemplo, '111222333'.
- website - al especificar este campo, podemos importar correos electrónicos a múltiples páginas en Rating Captain simultáneamente. Este campo debe estar lleno con el nombre exacto de la página en el sistema Rating Captain. Si no se proporciona este campo de forma predeterminada, la importación se guardará en la página activa.
- place_name - al agregar este campo, especificas a qué portal de reseñas en Rating Captain se debe asignar el cliente. Este campo debe ser el nombre exacto del portal de reseñas en el sistema Rating Captain. Puedes encontrar todos tus portales de reseñas vinculados en la pestaña Página => Perfiles. Si no proporcionas este campo, Rating Captain asignará automáticamente la plataforma a las opiniones.
- products - lista de productos en el pedido. Esta es una opción avanzada y requiere la ayuda de un programador. Este campo debe ser un campo JSON válido. Cada objeto en la matriz debe contener campos como id - ID del producto, name - nombre del producto, price - precio del producto, opcionalmente image_url - URL de la imagen del producto, product_url - URL del producto.
Guarda el archivo generado con los encabezados proporcionados en formato Microsoft Excel (.xlsx) o .csv (valores separados por punto y coma o comas).
¿Cómo analizar las opiniones de los clientes?
Una vez que hayas obtenido opiniones, es hora de analizarlas. Sigue los pasos a continuación para verificar las calificaciones y opiniones de los clientes.
- Ve a la pestaña Calificaciones y opiniones.
- En la parte superior encontrarás filtros que te permitirán analizar los diferentes tipos de opiniones.
- En la sección Categorías puedes verificar los obstáculos que enfrentan los clientes al utilizar tu oferta.
- En la tabla verás las calificaciones y comentarios según los filtros seleccionados.
- También presta atención al sentimiento de la opinión (barra roja o verde).
¡Muy importante! No olvides responder a cada opinión que aparezca.
Una vez que conozcas las preocupaciones de tus clientes, intenta realizar cambios en el funcionamiento de la empresa que aumenten la satisfacción de los consumidores. ¿Quizás debas revisar el servicio al cliente? ¿O tal vez es hora de cambiar el proveedor de tus productos?