<script>
    var RatingCaptain_data_script = {
        /* REQUIRED | Email, on this address will be send message */
            "email": "{$order->email}",
        /* REQUIRED | Order in your system, this field should be unique */
            "external_id": "{$order->id}",
        /* Optional - Products in this order, each product must have id name and price. */
        "products": [
                    {
                        "id": "{$product->id}",
                        "name": "{$product->name}",
                        "price": "{$product->price}",
                        "imageUrl": "{$product->image}",
                    },
        ]
    }
</script>
<script src="https://api.ratingcaptain.com/js_v2/[Your website token]" async></script>

*Each item in bold must be properly configured depending on your system.
*Website token you can find here: Website page.


First steps
Second step - basic functions
Second step - basic functions
Welcome to Rating Captain! We have prepared for you special instructions how to configure the account.
<script>
    var rc_products = {/literal}[{foreach from=$items item=i name=list}
{
    'id': '{$i->product_id}',
    'name': '{$i->name}',
    'price': '{$i->price_gross|money_without_currency}',
    'imageUrl': '{$i->product->images[0]->url|product_img_url:th100}'
},
    {/foreach}]{literal};
        var RatingCaptain_data_script = {
            "email": '{client_email}',
            "external_id": '{order_id}',
            "products": rc_products
        }
</script>
<script src="https://ratingcaptain.com/api/js_v2/[Your website token]" async></script>

*Website token you can find here: Website page.
<script>
    var rc_products = [{products}
        {
        "id": "{products.product_id}",
        "price": "{products.float_price}",
        "imageUrl": "{products.img}",
        "name": "{products.name}"
        },
    {/products}];
    var RatingCaptain_data_script = {
        "email": '{email}',
        "external_id": '{order_id}',
        "products": rc_products
    }
</script>
<script src="https://ratingcaptain.com/api/js_v2/[Your website token]" async></script>

*Website token you can find here: Website page.
<script>
    var RatingCaptain_data_script = {
            "email": "[[email]]",
            "external_id": "[[orderid]]"
    }
</script>
<script src="https://ratingcaptain.com/api/js_v2/[Your website token]" async></script>

*Website token you can find here: Website page.
{% block page_checkout_finish_rating_captain %}
    {% set ratingProducts = [] %}
    {% for lineItem in page.order.lineItems.elements %}
        {% if lineItem.type is same as 'product' %}
            {% if lineItem.cover.url %}
                {% set ratingProduct = {
                    id: lineItem.payload.productNumber,
                    name: lineItem.label,
                    price: lineItem.price.totalPrice,
                    imageUrl: lineItem.cover.url,
                } %}
            {% else %}
                {% set ratingProduct = {
                    id: lineItem.payload.productNumber,
                    name: lineItem.label,
                    price: lineItem.price.totalPrice,
                } %}
            {% endif %}
            {% set ratingProducts = ratingProducts|merge([ratingProduct]) %}
        {% endif %}
    {% endfor %}
    {% set ratingCaptainData = {
        email: page.order.orderCustomer.email,
        external_id: page.order.orderNumber,
        products: ratingProducts
    } %}
    <script>
        var RatingCaptain_data_script = [{{ ratingCaptainData | json_encode | raw }}];
    </script>
    <script src="https://ratingcaptain.com/api/js_v2/[Your website token]" async></script>
{% endblock %}

*Website token you can find here: Website page.
How to add the logo?
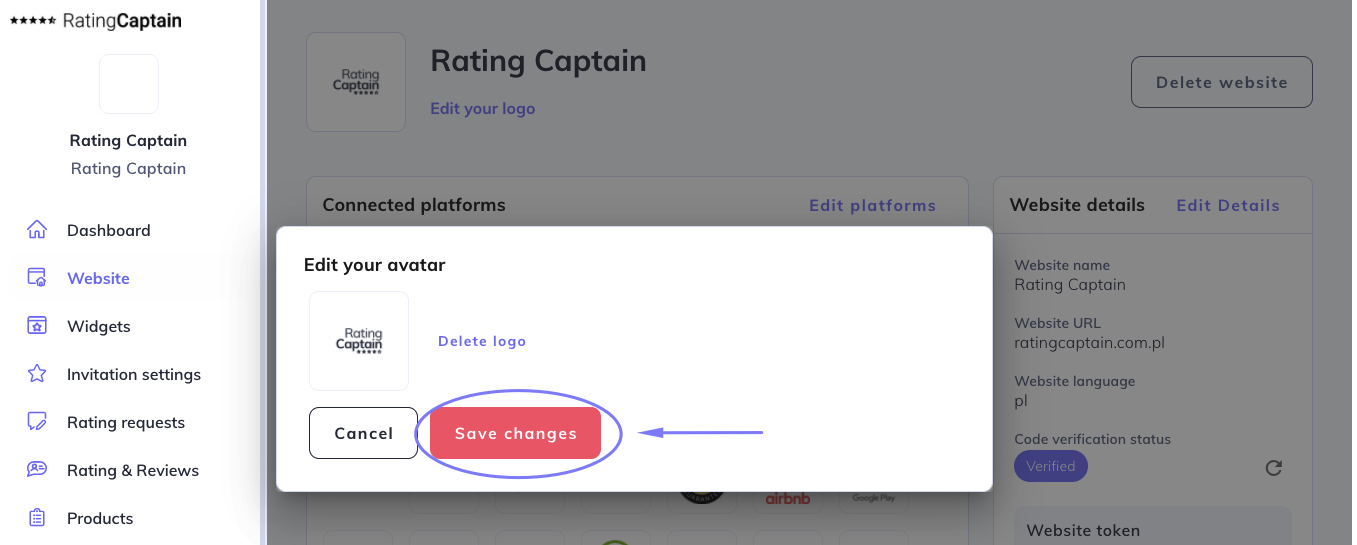
Go to the Website section.
At the top a white square will appear with the label Edit your logo.
After clicking on the inscription you will see the file adding window. The file should have a .png or .jpg extension, and weigh less than 2MB. After importing the file, click Save changes.

How to add a review site?
Go to the Website tab and then Profiles.
In the Find your profile field enter the company name and the city in which it is located and click Search. Next, the application will show you the found profiles of your company on various portals.
Select the profiles to which you want to collect reviews by clicking the Add this profile button. On the right side you will find a section Added profiles. Confirm their selection by clicking Add selected profiles. We recommend that you start by choosing your profile in Google My Business.
How to setup a feedback invitation?
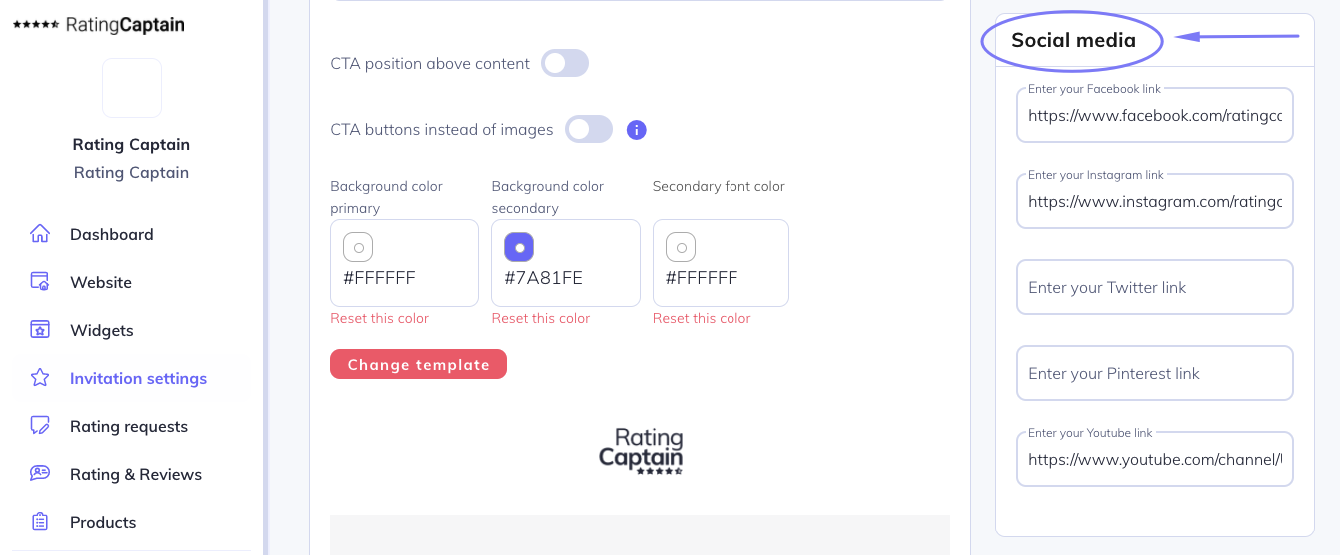
Go to the Invitation settings --> Email settings.
You will find there an editable invitation template. Below the template, enter the e-mail address to which notifications about your feedback will be sent.
On the right side you will see the Emails settings option, where you can add information how many days after placing the order the customer will receive an invitation. If you don’t change anything there, your customers will be receiving an invitation after 7 days. You can also decide how often and how frequently the application will send the invitations. We recommend choosing 2 repeats every 5 days. If the client has already given the review, he won’t get another invitation.
It is really worth sending a test invitation. In the tab Invitation settings you are able to add your social media, that will show up on invitations.

Don’t forget to save the changes.
Content of the form after receiving a negative reaction
It is a good idea to set up the content of the message, which will be sent to customers who want to share a negative review. Go to the Invitation settings section.
Below you will see an editable message template. Remember to save the changes.
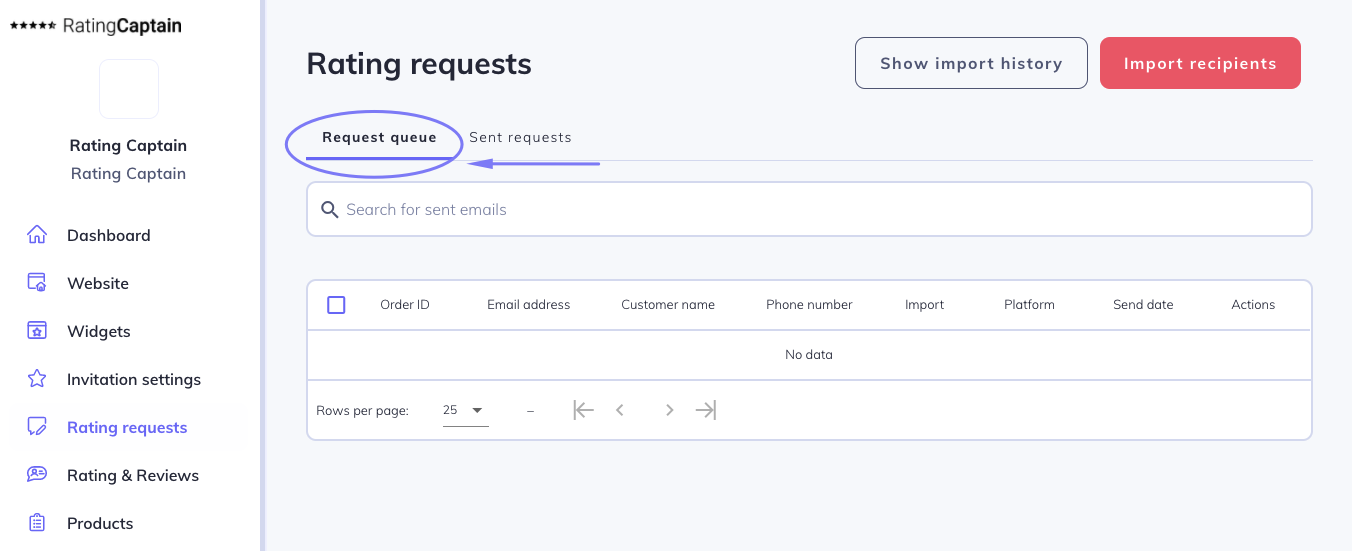
Correct account configuration - Invitation queue
The tool is properly configured if in 24 hours after integration, orders and customer e-mails start to appear in the tab Invitations → Invitation queue.
There you will also see the date the request for feedback was sent to the customer.

Personalize your invitations
Personalize your feedback invitations by adding name, e-mail address, phone number, order or a list of products the customer has purchased. Of course, you can include several options in the body of message.
With a personalized invitation, you can increase the chances that the customer will respond to the invitation.
Comment améliorer l'efficacité des e-mails ?
Pour améliorer l'efficacité des e-mails d'invitation à donner votre avis, vous pouvez inclure les éléments suivants :
- le logo de votre entreprise - les gens sont principalement visuels, donc grâce au logo, ils peuvent se rappeler qui leur écrit, de plus, vous avez un impact sur la notoriété de votre marque ;
- un objet de l'e-mail court indiquant son but ;
- il est également intéressant de tester l'inclusion d'un CTA (appel à l'action) au-dessus du contenu de l'e-mail, sous forme de boutons ;
- ajoutez des variables, telles que : prénom, adresse e-mail, numéro de commande ou liste de produits ;
- choisissez une palette de couleurs pour l'invitation qui correspond aux couleurs de votre marque ;
- vous pouvez également tester un autre modèle d'e-mail.
Comment télécharger un fichier contenant les e-mails des clients ?
Pour importer la liste des clients, suivez les étapes ci-dessous.
- Accédez à l'onglet Invitations.
- Cliquez sur le bouton Importer les clients dans le coin supérieur droit.
- Définissez la date d'envoi des invitations pour demander un avis.
- Ensuite, cliquez sur Ajouter un fichier et importez la liste de contacts préparée.
- Enfin, cliquez sur Enregistrer les modifications.
- Les données importées apparaîtront dans la file d'attente des invitations.
Dans l'application, vous pouvez télécharger un fichier d'exemple .csv ou .xlsx que vous pouvez ensuite modifier selon vos besoins.
Attention ! Votre fichier doit contenir une colonne intitulée 'email' (obligatoire).
Dans le fichier, vous pouvez ajouter plusieurs colonnes. Ci-dessous se trouvent leurs en-têtes avec une description.
- email - adresse e-mail du client, par exemple '[email protected]' - colonne obligatoire.
- name - prénom ou prénom et nom du client, par exemple 'Jan Kowalski'.
- phone - numéro de téléphone de l'utilisateur, par exemple '111222333'.
- website - en spécifiant ce champ, nous pouvons importer des e-mails vers plusieurs pages sur Rating Captain simultanément. Ce champ doit être rempli avec le nom exact de la page dans le système Rating Captain. Par défaut, si ce champ n'est pas spécifié, l'importation sera enregistrée sur la page active.
- place_name - en ajoutant ce champ, vous spécifiez à quelle plateforme d'avis dans Rating Captain le client doit être attribué. Ce champ doit être le nom exact de la plateforme d'avis dans le système Rating Captain. Vous pouvez trouver toutes vos plateformes d'avis connectées dans l'onglet Page => Profils. Si vous ne spécifiez pas ce champ, Rating Captain attribuera automatiquement la plateforme aux avis.
- products - liste des produits commandés. Il s'agit d'une option avancée qui nécessite l'aide d'un développeur. Ce champ doit être un champ JSON valide. Chaque objet dans le tableau doit contenir des champs tels que id - ID du produit, name - nom du produit, price - prix du produit, éventuellement image_url - URL de l'image du produit, product_url - URL du produit.
Enregistrez le fichier généré avec les en-têtes spécifiés au format Microsoft Excel (.xlsx) ou .csv (valeurs séparées par des points-virgules ou des virgules).
Comment analyser les avis des clients ?
Maintenant que vous avez recueilli des avis, il est temps de les analyser. Pour consulter les notes et les avis des clients, suivez les étapes ci-dessous.
- Accédez à l'onglet Notes et avis.
- En haut, vous trouverez des filtres qui vous permettront d'analyser les différents types d'avis.
- Dans la section Catégories, vous pouvez vérifier les obstacles auxquels les clients sont confrontés lorsqu'ils utilisent votre offre.
- Ensuite, dans le tableau, vous verrez les notes et les commentaires correspondant aux filtres que vous avez sélectionnés.
- Prêtez également attention au sentiment de l'avis (barre rouge ou verte).
Très important ! N'oubliez pas de répondre à chaque avis qui apparaît.
Une fois que vous connaissez les problèmes de vos clients, essayez d'apporter des changements à votre entreprise qui augmenteront la satisfaction des consommateurs. Peut-être devez-vous examiner le service client ? Ou peut-être est-il temps de changer de fournisseur pour vos produits ?