<script>
    var RatingCaptain_data_script = {
        /* REQUIRED | Email, on this address will be send message */
            "email": "{$order->email}",
        /* REQUIRED | Order in your system, this field should be unique */
            "external_id": "{$order->id}",
        /* Optional - Products in this order, each product must have id name and price. */
        "products": [
                    {
                        "id": "{$product->id}",
                        "name": "{$product->name}",
                        "price": "{$product->price}",
                        "imageUrl": "{$product->image}",
                    },
        ]
    }
</script>
<script src="https://api.ratingcaptain.com/js_v2/[Your website token]" async></script>

*Each item in bold must be properly configured depending on your system.
*Website token you can find here: Website page.
Rank #1 on Google Maps and be the Local Leader
Collect Customer Reviews on Google
Polish
Swiss
First steps
Second step - basic functions
First steps
Second step - basic functions
Welcome to Rating Captain! We have prepared for you special instructions how to configure the account.
<script>
    var rc_products = {/literal}[{foreach from=$items item=i name=list}
{
    'id': '{$i->product_id}',
    'name': '{$i->name}',
    'price': '{$i->price_gross|money_without_currency}',
    'imageUrl': '{$i->product->images[0]->url|product_img_url:th100}'
},
    {/foreach}]{literal};
        var RatingCaptain_data_script = {
            "email": '{client_email}',
            "external_id": '{order_id}',
            "products": rc_products
        }
</script>
<script src="https://ratingcaptain.com/api/js_v2/[Your website token]" async></script>

*Website token you can find here: Website page.
<script>
    var rc_products = [{products}
        {
        "id": "{products.product_id}",
        "price": "{products.float_price}",
        "imageUrl": "{products.img}",
        "name": "{products.name}"
        },
    {/products}];
    var RatingCaptain_data_script = {
        "email": '{email}',
        "external_id": '{order_id}',
        "products": rc_products
    }
</script>
<script src="https://ratingcaptain.com/api/js_v2/[Your website token]" async></script>

*Website token you can find here: Website page.
<script>
    var RatingCaptain_data_script = {
            "email": "[[email]]",
            "external_id": "[[orderid]]"
    }
</script>
<script src="https://ratingcaptain.com/api/js_v2/[Your website token]" async></script>

*Website token you can find here: Website page.
{% block page_checkout_finish_rating_captain %}
    {% set ratingProducts = [] %}
    {% for lineItem in page.order.lineItems.elements %}
        {% if lineItem.type is same as 'product' %}
            {% if lineItem.cover.url %}
                {% set ratingProduct = {
                    id: lineItem.payload.productNumber,
                    name: lineItem.label,
                    price: lineItem.price.totalPrice,
                    imageUrl: lineItem.cover.url,
                } %}
            {% else %}
                {% set ratingProduct = {
                    id: lineItem.payload.productNumber,
                    name: lineItem.label,
                    price: lineItem.price.totalPrice,
                } %}
            {% endif %}
            {% set ratingProducts = ratingProducts|merge([ratingProduct]) %}
        {% endif %}
    {% endfor %}
    {% set ratingCaptainData = {
        email: page.order.orderCustomer.email,
        external_id: page.order.orderNumber,
        products: ratingProducts
    } %}
    <script>
        var RatingCaptain_data_script = [{{ ratingCaptainData | json_encode | raw }}];
    </script>
    <script src="https://ratingcaptain.com/api/js_v2/[Your website token]" async></script>
{% endblock %}

*Website token you can find here: Website page.
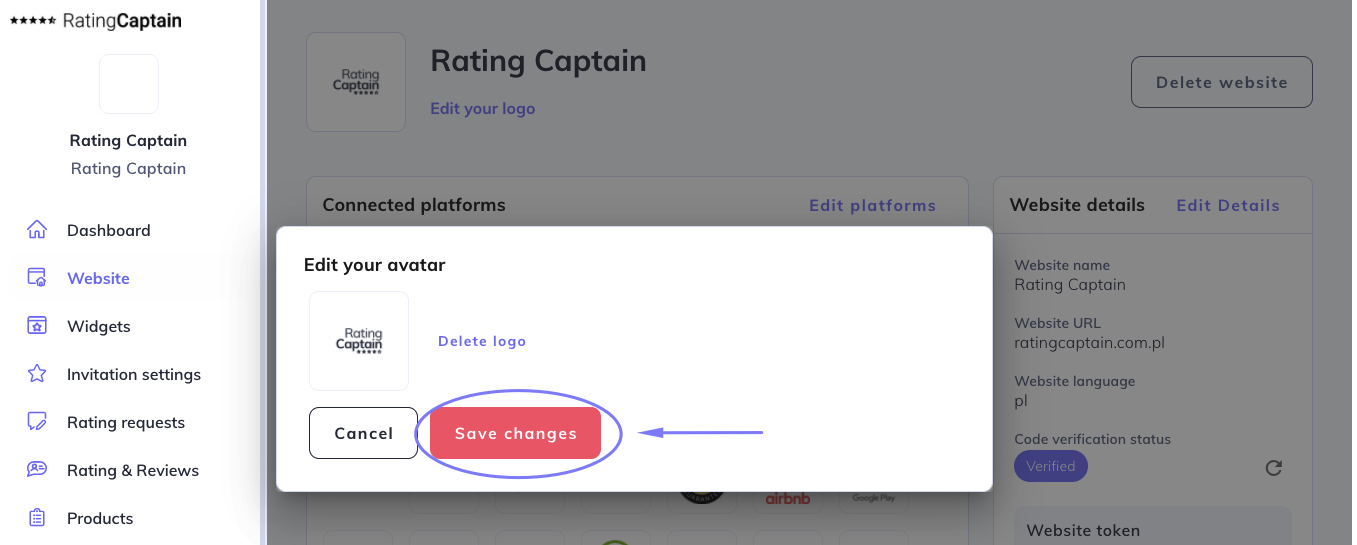
How to add the logo?
Go to the Website section.
At the top a white square will appear with the label Edit your logo.

After clicking on the inscription you will see the file adding window. The file should have a .png or .jpg extension, and weigh less than 2MB. After importing the file, click Save changes.
How to add a review site?
Go to the Website tab and then Profiles.
In the Find your profile field enter the company name and the city in which it is located and click Search. Next, the application will show you the found profiles of your company on various portals.

Select the profiles to which you want to collect reviews by clicking the Add this profile button. On the right side you will find a section Added profiles. Confirm their selection by clicking Add selected profiles. We recommend that you start by choosing your profile in Google My Business.

How to setup a feedback invitation?
Go to the Invitation settings --> Email settings.
You will find there an editable invitation template. Below the template, enter the e-mail address to which notifications about your feedback will be sent.

On the right side you will see the Emails settings option, where you can add information how many days after placing the order the customer will receive an invitation. If you don’t change anything there, your customers will be receiving an invitation after 7 days. You can also decide how often and how frequently the application will send the invitations. We recommend choosing 2 repeats every 5 days. If the client has already given the review, he won’t get another invitation.

It is really worth sending a test invitation. In the tab Invitation settings you are able to add your social media, that will show up on invitations.
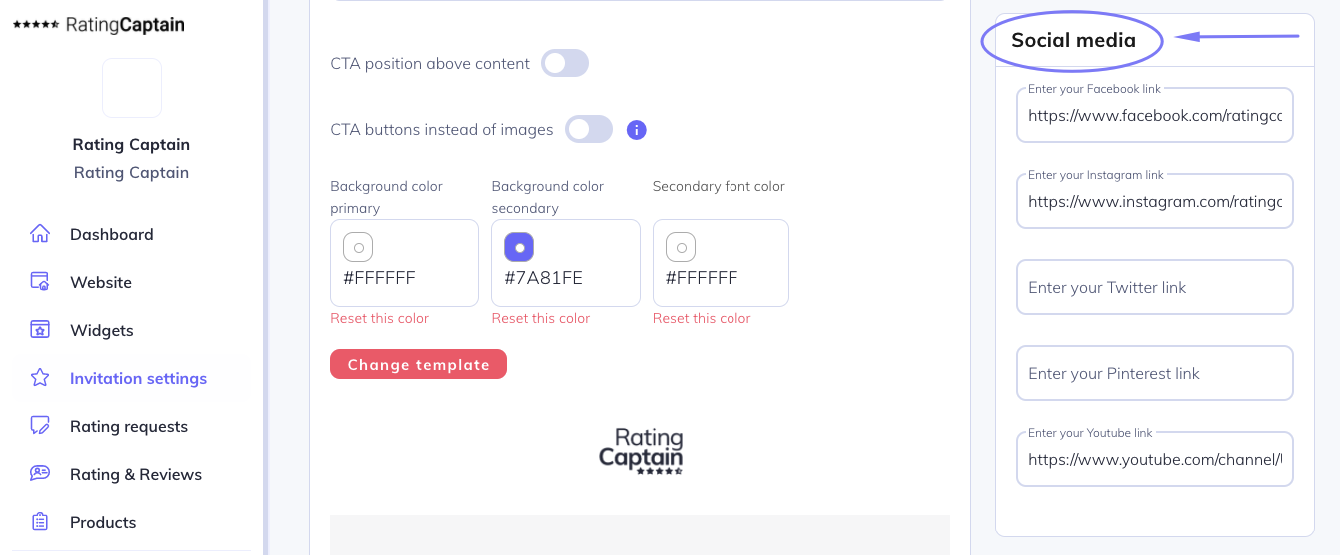
Don’t forget to save the changes.

Content of the form after receiving a negative reaction
It is a good idea to set up the content of the message, which will be sent to customers who want to share a negative review. Go to the Invitation settings section.

Below you will see an editable message template. Remember to save the changes.

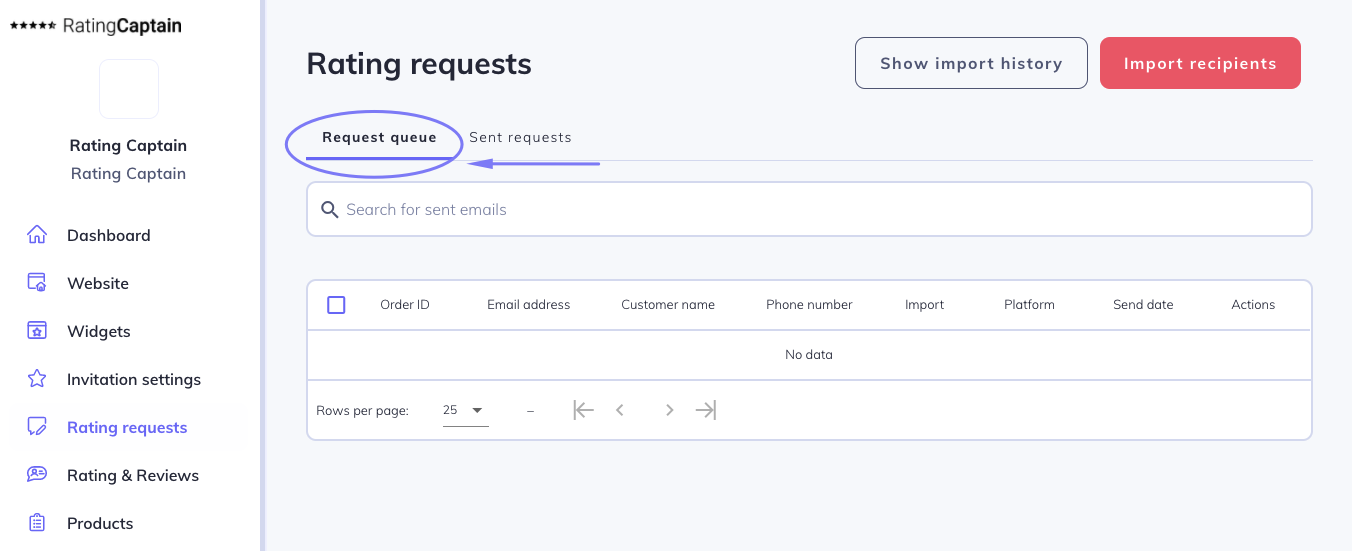
Correct account configuration - Invitation queue
The tool is properly configured if in 24 hours after integration, orders and customer e-mails start to appear in the tab Invitations → Invitation queue.

There you will also see the date the request for feedback was sent to the customer.
Personalize your invitations
Personalize your feedback invitations by adding name, e-mail address, phone number, order or a list of products the customer has purchased. Of course, you can include several options in the body of message.
With a personalized invitation, you can increase the chances that the customer will respond to the invitation.
How to improve the effectiveness of emails?
To improve the effectiveness of invitation emails for feedback, you can include the following elements in them:
- Your company's logo - people are mostly visual, so the logo can help them remember who is writing to them. Moreover, you have an impact on increasing the recognition of your brand.
- A short email subject informing about its purpose.
- It is also worth testing the inclusion of a Call to Action (CTA) above the actual email content, in the form of buttons.
- Add variables such as: name, email address, order number, or a list of products.
- Match the invitation's color scheme to your brand's colors.
- You can also test a different email template.
How to upload a file with customer emails?
To import the list of customers, follow the steps below.
- Go to the Invitations tab.
- Click the Import customers button in the top right corner.
- Set the date for sending invitations requesting feedback.
- Then click Add file and import the prepared contact list.
- Finally, click Save changes.
- The imported data will appear in the Invitation queue.
In the application, you can download a sample .csv or .xlsx file, which you can then edit according to your needs. Note! Your file should contain a column named 'email' (required). In the file, you can add several columns. Below are their headers along with descriptions.
- email - customer's email address e.g. '[email protected]' - required column.
- name - customer's first name or full name e.g. 'John Smith'.
- phone - user's phone number e.g. '111222333'.
- website - by specifying this field, we can import emails to multiple pages in Rating Captain simultaneously. This field should be filled with the exact name of the page in the Rating Captain system. By default, if this field is not provided, the import will be saved to the active page.
- place_name - by adding this field, you specify to which review portal in Rating Captain the customer should be assigned. This field should be the exact name of the review portal in the Rating Captain system. You can find all your connected review portals in the Page => Profiles tab. If you do not provide this field, Rating Captain will automatically assign the platform for reviews.
- products - list of products in the order. This is an advanced option and requires the help of a programmer. This field should be a valid JSON field. Each object in the array should contain fields such as id - product ID, name - product name, price - product price, optionally image_url - product image URL, product_url - product URL.
The generated file with the specified headers should be saved in Microsoft Excel (.xlsx) or .csv format (values separated by semicolons or commas).
How to analyze customer opinions?
Now that you have gathered feedback, it's time to analyze it. To check ratings and customer reviews, follow the steps below.
- Go to the Ratings and Reviews tab.
- At the top, you will find filters that will allow you to analyze different types of reviews.
- In the Categories section, you can see what obstacles customers encounter when using your offer.
- In the table, you will see ratings and comments according to the filters you have chosen.
- Also, pay attention to the sentiment of the reviews (red or green bar).
Very important! Don't forget to respond to every review that appears.
Once you know your customers' pain points, try to make changes in the company's operations that will increase customer satisfaction. Maybe you need to look at customer service? Or maybe it's time to change your product supplier?
More info can be found here:
Was the article helpful?
Thank you for rate this article.
189 out of 237 found this article helpful
Tabel of contents
Still need help?
If you have not found the information you are interested in, contact us directly. Our support will help to solve your doubts
To start
Watch our video explaining the basic functions of Rating Captain.